SD Card Shows Incorrect Capacity
Summary
This article will introduce you how to restore your cherished data from your SD card before formatting or other dangerous operations, when your SD card shows incorrect capacity and inner card data also becomes inaccessible or invisible.
SD Card Data Recovery by 4Card Recovery
Free download 4Card Recovery to rescue all wanted information back from the SD card that now shows wrong size and needs to be formatted or fixed quickly for latter use.
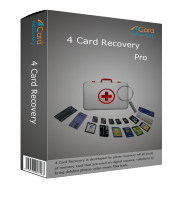
SD Card Shows Incorrect Capacity & Needs to Be Formatted?
Do you still remember what has happened to your SD card when you find your SD card shows incorrect capacity? Do you know any clue about this card problem? In fact, Newly purchased SD card can show incorrect capacity since you are not formatted this card before saving your important or newly made files, images, videos and mails there; Long-time used SD card can show incorrect capacity since there are some physical damages or corruptions; Dropped or improperly extracted SD card can show incorrect capacity since there is an incompatible file system, like RAW; Unchecked SD card can show incorrect capacity for virus attack; And SD card can also simply show a far smaller capacity after you’ve saved a large amount of crucial data there. Want to know where your cherished card data is going and rescue it all back? Don’t panic! No matter what happens there, keep this SD card unused and try to get your wanted stuffs back with SD card data recovery software.
Rescue SD Card Data back at the First Place
No matter how and why this SD card shows incorrect capacity, your stored card stuffs probably are not all damaged and irrecoverable. Therefore, before you format this SD card to its proper size, you can check this card with some SD card data recovery software like 4Card Recovery to see whether all your remained card information is still useful and recoverable. With this data recovery software, you often can easily and successfully re-view most even all of your original card data. So, follow below steps to get everything back:
Step 1:
Click the "download" icon to attain and launch this software to your PC. Run this software to choose a right data recovery mode.
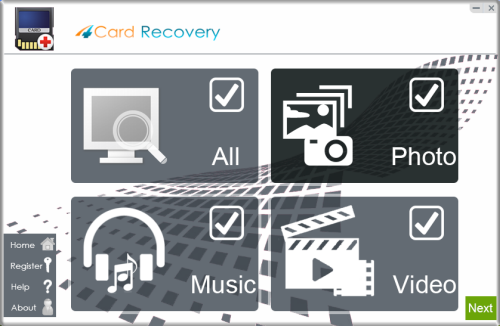
Select recovery options in the main interface
Step 2:
Locate this SD card shown on the software screen and start to scan this card as soon as possible.
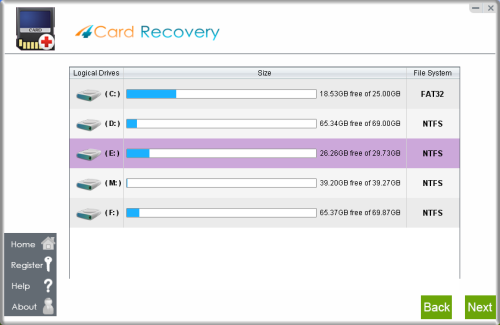
Select card to search photos off card
Step 3:
Look for all recoverable and wanted card stuffs after scanning process is finished. Just click its "Preview" button in advance.
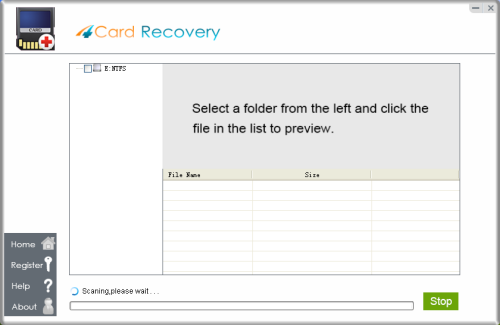
Wait while scanning lost photos, sometimes it takes about 20 minutes to scan a 32G card.
Tips: if it takes more than 2 hours to scan a 32GB card, you may stop the scanning and wait to see
what's already found. Since the card may contains bad blocks that takes longer time than usual.
Step 4:
Select a computer drive or partition to place all restored card stuffs. This SD card is not supposed to be the destination device.
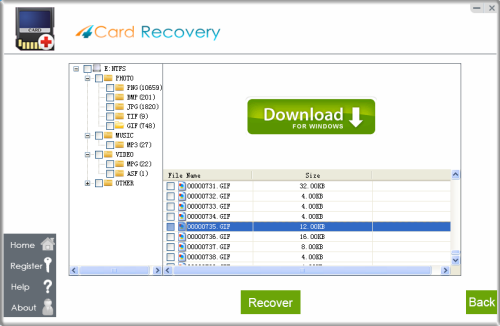
Preview lost photos and save found files. It would generate a folder to contain your lost data.
Please do not save the photo to the card where you lost them. Save them to your PC drive!
Note:
* You are warned not to save new stuffs on this SD card and also not format this card before rescuing your stuffs as many as possible.
* You are warned not to store all restore card information on this SD card after data recovery, simply in case of data recovery failures.
* You are warned to prepare SD card data backups well all the time in the future.
Format SD Card to Check Whether Card Capacity Could Be Restored
To let your SD card show right capacity, there are many solutions. But, the easiest and most efficient one is to format this SD card to take chances. If this card problem is caused by RAW file system, formatting process often can restore all rest card data back. If it is caused by improper operations, like dropping, falling or virus attack, the formatting process also can help restore much original card space back. But, if it is caused by physical damages or corruptions, the result could be different according to your card conditions. Therefore, just format your SD card to see whether it can be fixed.
Note: If the formatting process is also useless, you’d better remember this lesson and buy a new card for future use.
4CardRecovery Awards
Hot Searches
More Related Articles You May Like
- karbonn mobile phone card recovery- you are able to recover data from karbonn mobile phone memory card after deleting, formatting,raw file system, etc...Read more >>
- android phone memory card recovery- with a third-party memory card recovery software, you can recover data from any android phone like sony, nokia, samsung,etc...Read more >>
- micro sd card photo recovery- freeware to recover data from micro sd card after formatting, deleting, not formatted error or other kinds of reasons...Read more >>
- sony phone card data recovery- when files got lost from a memory card on sony phone, you still have chance to get back the lost files before they got overwritten...Read more >>
- samsung phone memory card data recovery- data recovery software download to restore photos, videos, music, documents, emails, etc from samsung phone card..Read more >>


