Unable to Format USB Flash Drive back to NTFS
Summary
This article is about how to regain all RAW USB flash drive data by using an easy-to-grasp RAW USB flash drive data recovery tool (4Card Recovery).
RAW USB Drive Data Recovery by 4Card Recovery 
Free download 4Card Recovery to get back all inaccessible data inside this RAW USB flash drive and also restore its RAW file system back to your wanted NTFS.
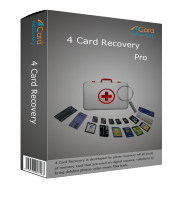
Are You Unable to Format RAW USB Flash Drive?
Windows suggests you to format USB flash drive after connecting it to your PC? USB flash drive file system also turns into RAW? But, RAW USB flash drive is also unable to be formatted for the stored useful information? OK! Take it easy! You can resolve everything well! In fact, in your case, only two simple steps can help you out! With 4Card Recovery, you always can have amazing experiences to retrieve all types of information back from a memory card or USB flash drive. Its four power data recovery options and easy-to-handle interface can make a really unforgettable impression on you.
Steps to Recover Data from RAW USB Drive
Step 1:
Have you plunged this RAW USB flash drive to your PC now? If not, you’d better connect it well right now. Download this 4Card Recovery to your computer immediately! And also launch and install it well. Freely specify a fixable data recovery option from the coming main window.
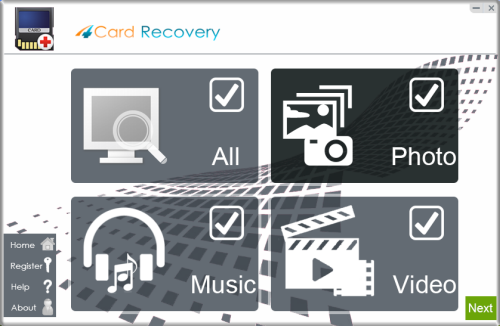
Select recovery options in the main interface
Step 2:
Highlight this RAW USB flash drive to start data recovery scanning.
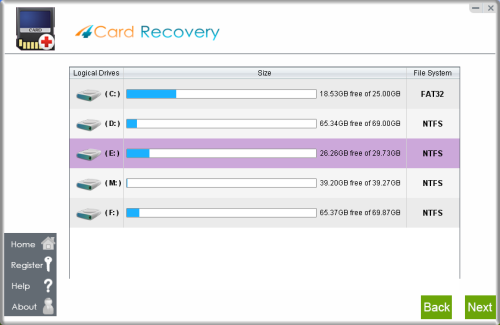
Select card to search photos off card
Step 3:
The scanning process will last for several minutes, please wait patiently.
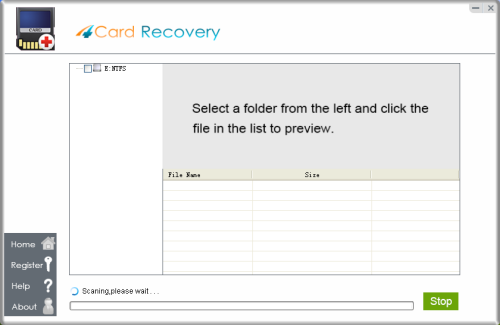
Wait while scanning lost photos, sometimes it takes about 20 minutes to scan a 32G card.
Tips: if it takes more than 2 hours to scan a 32GB card, you may stop the scanning and wait to see
what's already found. Since the card may contains bad blocks that takes longer time than usual.
Step 4:
Restore all picked data back and save it on another drive or storage device.
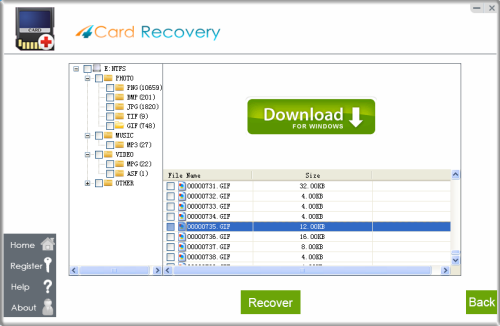
Preview lost photos and save found files. It would generate a folder to contain your lost data.
Please do not save the photo to the card where you lost them. Save them to your PC drive!
Note
* Never format this USB flash drive before data recovery.
* Never overwrite this USB flash drive before data recovery.
* Never save retrieved information on this USB flash drive.
* Never store all important data on only one place in the future.
Format USB Flash Drive back to NTFS without Hesitation
In order to change the unrecognizable state of your USB flash drive, you always are asked to format this USB drive after restoring all contained data back. So, you can freely format this drive as you wish. Remember to set the final file system as “NTFS”
How to Remove Virus out of USB Flash Drive?
Want to know whether your USB flash drive is virus-infected? Want to remove existing virus off from your USB flash drive without data loss? OK! Don’t worry! What you should do is really simple! Let’s learn it step by step:
Step1. Do a virus scan on your USB flash drive and delete any existing one.
As we all know, virus could be really dangerous and always threat our computer/drive data all the time. Therefore, as long as you find something strange and suspicious, you’ve better run your antivirus tool to check whether your drive or PC is attacked by virus. If anyone is found, you’d better delete it quickly.
Step2. Back up all your needed data on another drive.
After running the antivirus tool, if your flash drive has no any virus or threat, you’d better immediately back up all newly made data well in case of any similar problem. Of course, unfortunately, if your USB flash drive is really infected, you are also supposed to back up your important data as soon as possible. To avoid spread the virus to your backup drives or storage devices, you’d better copy all files one by one.
Step3. Format this USB flash drive.
The formatting process can help clean all possible viruses off from your USB flash drive completely. (That is also why you are asked to back up all important data well in advance.)
Step4. Copy back all your transferred data.
After removing all existing viruses and threats on this USB flash drive, you can freely copy back your data on this drive without worries. It is safe now.
4CardRecovery Awards
Hot Searches
More Related Articles You May Like
- Recover files from raw usb drive - how to retrieve files from a raw usb flash drive...Read more >>
- Format usb drive to fat32 - free restore data from raw usb drive before you can convert it back to fat32...Read more >>
- RAW drive error on flash drive - raw drive error is one of the most common reason for usb data loss...Read more >>
- USB drive not formatted error with raw file system - if you usb drive has raw file system and shows not formatted error, you should recover data first...Read more >>
- Change usb from raw to ntfs or fat32 - how can you restore data from a raw flash drive and format it to fat32 or ntfs...Read more >>


