Restore Files from USB Hard Drive Converted from RAW to NTFS
Summary
Learn how to restore wanted USB drive files, videos, images and others back before or after you convert the file system of this drive from RAW to NTFS.
RAW USB Hard Disk Recovery by 4Card Recovery
Free download 4Card Recovery to take inaccessible external drive data back when your USB hard drive file system needs to be formatted from RAW to NTFS at first.
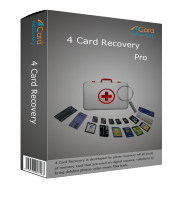
Have Converted Your External Hard Drive RAW File System to NTFS?
Have rushed to format your external hard drive RAW file system to NTFS when you get a drive not formatted error on your computer? Or are you still in panic and considering whether it is safe to directly convert this external drive from RAW to NTFS file system without taking remained drive data out? Really worry about your files, images, videos, audios and other information stored this USB drive? All right! Don’t be so nervous! No matter whether you’ve converted this drive from RAW to NTFS file system, you absolutely can rely on RAW USB hard drive data recovery software to rescue your left drive files back.
Detailed Instructions to Restore Data from USB Hard Disk
The formatting process is really an easy and quick way to convert the drive RAW file system to NTFS and also restore the common use of this USB hard disk. But, just after that fixable formatting process, you also find all your remained drive contents are missing at the same time, right? OK! Don’t panic! Your USB drive stuffs are not really lost or erased. They are only invisible now and hidden somewhere. With the help of efficient external hard drive data recovery software like 4Card Recovery (which is highly recommended by many data recovery experts for its well-designed four data recovery modes, easy-to-use data recovery interfaces and other wonderful features), you often can easily find them and let them all visible and useful again within several simple clicks.
Here are some detailed instructions for you to get your USB hard disk data back:
Step 1:
Download this 4Card Recovery and run your downloaded version on your computer. And then, go to the main screen of this software to choose a fixable data recovery mode.
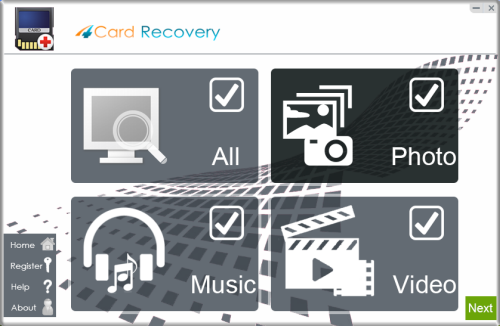
Select recovery options in the main interface
Step 2:
Go to the media interface to choose the drive that contains all your missing data and scan this drive for finding all lost data.
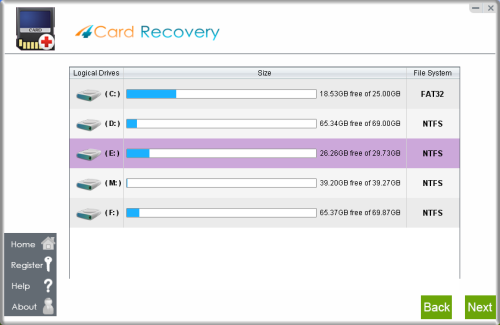
Select card to search photos off card
Step 3:
Click different scanned files to preview them and pick all your needed original ones out.
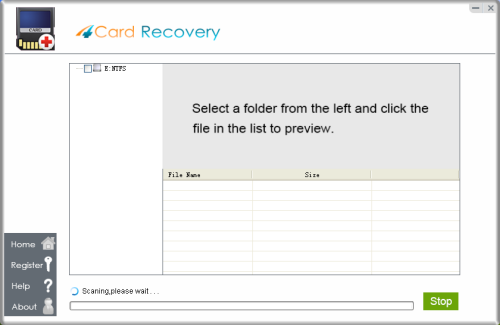
Wait while scanning lost photos, sometimes it takes about 20 minutes to scan a 32G card.
Tips: if it takes more than 2 hours to scan a 32GB card, you may stop the scanning and wait to see
what's already found. Since the card may contains bad blocks that takes longer time than usual.
Step 4:
Recover all selected drive stuffs to prepared USB flash drive, another computer drive or online storage.
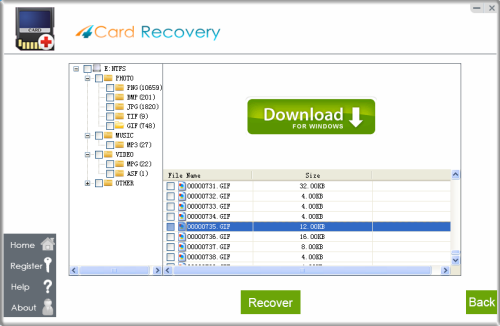
Preview lost photos and save found files. It would generate a folder to contain your lost data.
Please do not save the photo to the card where you lost them. Save them to your PC drive!
Pay Attention
* No matter whether this drive is formatted before the data recovery process, you’d better add no new data on this USB drive to destroy your original drive data.
*No matter whether this drive is fixed completely, you’d better not save all restored stuffs on this USB drive again to cause more possible data recovery failures.
* No matter whether you have extra external hard drives, you’d better save all your crucial drive data regularly on different partitions or locations to avoid any similar drive data loss problems.
What Should Be Done to Prevent Drive RAW File System Problem?
* Use your external hard drive on computer or laptops with compatible file system only.
* Back up or copy out all important drive data elsewhere when you do have to use this drive on unknown or incompatible computers.
* Properly extract your USB drive out from computers.
* Do antivirus scan on this USB drive every time you use it on your computer.
* Run CHKDSK to fix some basic drive problems after improper drive operations.
4CardRecovery Awards
Hot Searches
More Related Articles You May Like
- cannot read pictures on damaged micro sd card - download micro sd card photo recovery software to recover pictures when they cannot be viewed on damaged micro sd card...Read more >>
- download data recovery software - this page will introduce professional data recovery software to restore pictures videos music etc from memory card, flash drive, hard drive, etc...Read more >>
- restore missing data from external disk - have you ever lost any important data from an external hard disk? how can you get back lost files like videos music etc from external hdd...Read more >>
- unformatted flash drive data recovery - data is recoverable from a usb flash drive with data recovery software when it has not formatted error and cannot be accessed normally...Read more >>
- restore data from wiped external hdd - you may mistakenly wiping important data from your external hard disk. In this situation, you should stop using the external hard disk...Read more >>
- data recovery on raw external hard drive - download data recovery software to restore files when an external hard disk turns to raw file system and becomes inaccessible...Read more >>
- deleted file recovery from usb flash drive - if you want to recover deleted files from a usb flash drive, you should avoid writing new data to the usb flash drive after deleting...Read more >>
- data recovery from complete formatted external hard disk - full format external hard disk cannot erase everything completely, so you can restore lost files due to full format...Read more >>
- external hard disk deleted photo video recovery - as long as the external hard disk is not overwritten, you can restore any deleted data such as photos, videos, music, etc...Read more >>
- unformat external hard disk - download data recovery software to restore files like photos, videos, etc off external hard disk when you format it by mistake or other reasons...Read more>>


