Tips for RAW SD Card Data Recovery
Need Tips to Recover Data from RAW SD Card
Hello! Honestly, from yesterday, I had downloaded every possible data recovery program and tried every online trial version that I could find over the internet. But, none of them had restored all my smartphone information back from a RAW SD card. Can SD card recovery software really help retrieve inaccessible data back from RAW SD card? I was nearly about to give up. Do you have any idea? Have I done something wrong? I really need your tips to recover my data back from this RAW SD Card!
How many data recovery programs have your tried? Why they don’t restore your files back successfully, too expensive to restore everything back, too complicated to operate or figure out all options smoothly or even too bad recovery results? No matter what your answer is, don’t give up, keep on reading this article to know detailed tips and restore all your RAW SD card data back with reliable data recovery software.
Steps & Tips to Recover RAW SD Card Data
Every data recovery program developed by different designers or companies has their own pros and cons. That’s why you are supposed to select a proper one based on your card situations and conditions, not blindingly trying them one by one. Therefore, to avoid any unnecessary card data loss, you should immediately search the data recovery software information online and select a practical one like 4Card Recovery to get your wanted data back from this RAW SD Card at a time.
Here are detailed steps and tips of RAW SD card data recovery:
Step 1:
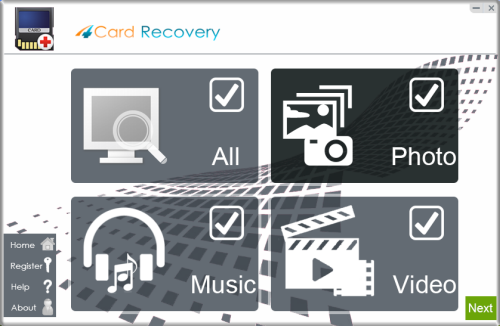
Download and launch this software on your computer. Click this software on the desktop and pick out a data recovery mode.

Select recovery options in the main interface
Step 2:
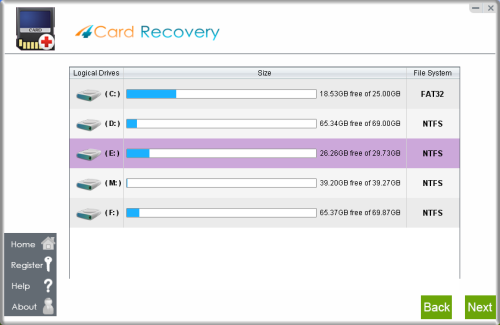
Choose the card reader or Smartphone which has your SD card inserted and begin to scan your lost data.

Select card to search photos off card
Step 3:
Choose the right data recovery mode from four to restore your files. Because of its simplicity, you always can easily understand every recovery mode only by reading their names.

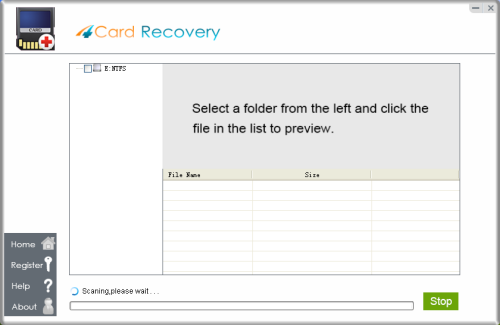
Wait while scanning lost photos, sometimes it takes about 20 minutes to scan a 32G card.
Tips: if it takes more than 2 hours to scan a 32GB card, you may stop the scanning and wait to see
what's already found. Since the card may contains bad blocks that takes longer time than usual.
Step 4:
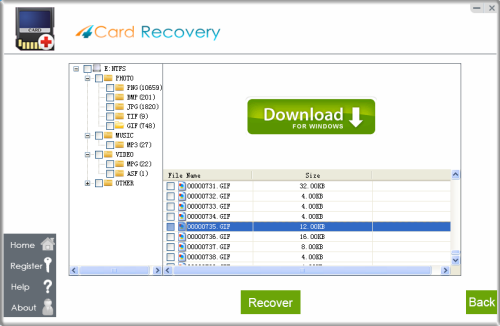
Choose a computer drive or partition to hold your restored card data.

Preview lost photos and save found files. It would generate a folder to contain your lost data.
Please do not save the photo to the card where you lost them. Save them to your PC drive!
Right Tips:
Proper data recovery software is only a good beginning of successful data recovery. In the following steps, you also should turn your attention to some tips:
* Farther data loss problems could be caused by new files written on the same RAW SD card.
* Farther data loss problems also could be caused by the formatting before data recovery.
* Farther data loss problems also could be caused by saving the restored data on this RAW SD card.
* Unwanted data loss problems could be avoided by making regular card data backups in the future.
One More Thing to Format This RAW SD Card
RAW file system doesn’t indicate the end of this SD card. Therefore, after restoring all your SD card files, also start to rescue this RAW SD card. Even through the RAW file system problem still exists right now, you can easily fix it with simple formatting process. So, format this RAW SD card back to previous file system.
RAW File System & NTFS/FAT32 File System
As a Windows computer user, you may know that the NTFS or FAT 32 is always the common file system of a Windows. But, how much do you know about “RAW” file system? In fact, RAW file system is a storage device state that cannot be read by Windows. That’s why all your RAW drive/memory card always inaccessible. But, don’t worry! The formatting process always can help you easily convert the RAW file system back to original NTFS or FAT32.
4CardRecovery Awards
Hot Searches
More Related Articles You May Like
- sandisk memory card data recovery-have you lost any data from your sandisk memory card due to deleting, formatting or other reasons...Read more >>
- sd card not formatted error-data is still recoverable from an sd card even it is showing sd card not formatted error or raw drive error...Read more >>
- memory card photo video recovery-how to restore photos or videos when got lost from a memory card like sd, xd, cf, etc...Read more >>
- formatted sd card data recovery-you need to rely on professional unformat tool to recover lost files off a formatted sd card...Read more >>
- corrupted sd card file recovery-recover data from a corrupted sd card as long as the card is not physically damaged...Read more >>


